Are you looking for a simple, effective way to manage your budget without the hassle of expensive software or complicated apps? Google Sheets is a fantastic tool that can help you track your income, expenses, and savings all in one place. Whether you’re trying to save for a big purchase, pay off debt, or just keep better tabs on your spending, Google Sheets offers a flexible and accessible solution that can be customized to fit your needs. In this guide, I’ll show you how to set up your budget, automate calculations, analyze spending patterns, and more—making it easier for you to stay on top of your finances and achieve your financial goals.
Google Sheets for Budgeting
Google Sheets is a powerful and flexible tool for managing personal and household finances. It’s more than just a spreadsheet; it offers a range of features and capabilities that make budgeting not only easier but also more efficient. Whether you’re a beginner or a seasoned pro, Google Sheets offers a straightforward platform to track income, expenses, and savings, giving you full control over your financial situation.
Why Google Sheets is an Excellent Tool for Budgeting
Google Sheets stands out as an excellent choice for budgeting for several reasons. First and foremost, it’s free and accessible to anyone with a Google account. It offers the flexibility to create custom budgets that suit your unique financial needs, with the added benefit of being cloud-based, meaning you can access your budget from any device with an internet connection.
One of the key reasons Google Sheets is ideal for budgeting is its ability to integrate with other Google tools, such as Google Forms or Google Calendar, for even more robust financial tracking. You can also use Google Sheets’ built-in formulas and functions to automate complex calculations, saving time and reducing the risk of errors. Additionally, the ability to share and collaborate with others in real-time makes it an especially good choice for family or household budgeting.
Benefits of Using Google Sheets Over Other Budgeting Tools
- Free to use: Google Sheets is entirely free, making it a cost-effective solution for anyone who wants to budget without paying for premium software or apps.
- Cloud-based: You can access your budget anywhere, anytime, on any device, so you’re always in control of your finances.
- Customizable: Google Sheets gives you full control to create your own budget format, making it flexible and adaptable to your personal needs.
- Real-time collaboration: Share your budget with family members or co-managers and work on it together in real time, ensuring that everyone stays on the same page.
- Automated calculations: Built-in functions like SUM, AVERAGE, and IF automate your calculations, so you don’t have to manually update totals or track every expense.
- Integration with other tools: Google Sheets integrates with other Google apps and external tools, allowing you to streamline your budgeting and connect it to other financial systems.
- Versatile data handling: You can easily add, remove, and update categories, transactions, and data as needed without worrying about limitations found in traditional budgeting software.
Key Google Sheets Features for Budgeting
- Customizable templates: Google Sheets offers a range of budget templates that you can personalize, or you can create a completely custom layout that works for your specific needs.
- Automatic calculations: Use built-in formulas to automatically sum expenses, calculate averages, and generate insights on your spending patterns.
- Charts and graphs: Visualize your spending and savings with pie charts, bar graphs, and line graphs that give you clear insights into where your money is going.
- Conditional formatting: Set rules to highlight key data, such as overspending in a category, or when you’ve reached a specific savings milestone.
- Data validation: Control the kind of data entered into cells, making it easier to maintain consistency and accuracy in your budget.
- Collaboration tools: Share your budget with others, allow them to edit or view, and leave comments for better communication and collaboration.
- Pivot tables: Analyze your financial data in more detail with pivot tables that can summarize your spending and income by category, time period, or other factors.
- Integration with Google Drive and other tools: Easily store your budget in Google Drive for secure access and sharing, and link your budget with other financial tools and apps for a comprehensive view of your finances.
These features, combined with its ease of use and flexibility, make Google Sheets an excellent tool for managing budgets of any complexity.
Setting Up Your Google Sheets Budget Spreadsheet
Creating a Google Sheets document for budgeting is the first step toward organizing your finances. This can be done quickly and without much hassle, thanks to the flexibility and ease of use that Google Sheets offers. Once you get started, you’ll find that creating and customizing your budget is an intuitive process that lets you take full control over your financial planning.
Creating a New Google Sheets Document for Budgeting
To kick off your budgeting journey, simply head over to Google Sheets and create a new document. If you already have a Google account, this will only take a few seconds. Open Google Sheets, click on the blank spreadsheet option, and you’ll be ready to go.
If you’re using this tool for the first time, it’s worth exploring the different ways you can structure your budget. You can create multiple sheets within one document for different months or financial categories. If you prefer a more visual approach, you could use color-coded tabs to differentiate between your income, expenses, and savings. This organizational flexibility means your budget can adapt as your needs evolve.
Once your sheet is set up, it’s important to give it a relevant name like “Monthly Budget” or “2025 Personal Finances.” This way, you’ll always know what each document is for and avoid confusion as you work on multiple projects.
Choosing the Right Template vs. Building from Scratch
Google Sheets offers a range of budgeting templates designed to make the setup process quicker. You’ll find options like monthly budget planners, annual trackers, or even debt payoff schedules in the template gallery. If you’re short on time and prefer a streamlined approach, these templates can be a great starting point.
However, building a budget from scratch allows you to have more control over how everything is structured. For example, if you have unique financial goals or need to incorporate specific categories that aren’t included in a pre-made template, you can set up everything the way you want it. When you start from scratch, you can customize every element, from the columns to the data entry format, making it a personalized and adaptable tool for your finances.
Whichever option you choose, the key is to ensure that the structure of your budget makes sense for your financial goals. Templates are convenient for beginners, while creating your own layout offers complete flexibility for those who need it.
Organizing Your Budget Categories
Once you’ve got the basics set up, it’s time to organize your budget. Start by dividing your sheet into clear sections that mirror the way you manage your finances. Typical categories to include are:
- Income: This section captures all sources of money you earn, such as your salary, freelance income, or any side hustles.
- Expenses: Break your expenses into fixed and variable categories. Fixed expenses include things like rent, car payments, and insurance, while variable expenses are things like groceries, utilities, and entertainment.
- Savings: This section can track your emergency fund, retirement savings, or specific goals like saving for a vacation. It’s also helpful for keeping a record of transfers to savings accounts.
A clean, well-organized structure is essential to tracking your finances accurately. You can even go a step further and create subcategories for things like food, housing, transportation, and entertainment, so your budget gives you a full picture of where your money is going each month.
Customizing Your Sheet for Personal or Household Budgeting
Personal and household budgeting can vary widely from person to person, and Google Sheets gives you the freedom to adjust your budget based on your specific situation. If you’re working on a household budget, you might want to include sections for different family members or set limits for shared expenses, like grocery bills or utility costs.
Customization also means adjusting for the way you prefer to see your financial data. For example, you could use conditional formatting to automatically highlight when you’ve exceeded a budgeted amount in any category, or you might want to use graphs and charts for a visual breakdown of your spending patterns. Color-coding different categories and adding notes or comments can also make the sheet easier to navigate.
Another helpful customization is adding formulas to track totals automatically. For example, a SUM formula will quickly calculate the total of each category, and an IF function can alert you when a category exceeds a predefined limit. This makes the process not only simpler but also more efficient, saving you time every month.
No matter how you organize or customize your budget, Google Sheets is designed to make it as simple or advanced as you need. The goal is to create a budgeting system that works seamlessly with your personal financial habits and helps you stay on track toward your goals.
Inputting Income and Expenses
Now that you have your budget set up, the next step is to start inputting your income and expenses. This is where you’ll begin to track your financial flow, so it’s important to set things up in a way that’s both organized and easy to update regularly. Here’s how you can do that effectively.
Setting Up Income Categories and Expected Values
Start by listing all your sources of income. This could include your regular salary, freelance work, rental income, dividends from investments, or any other form of income. Make sure each source has its own category, so you can easily track how much you’re making from each area.
Next to each category, input the expected value for each income source. For example, if you know you make $3,000 per month from your job, you’d input that figure next to your “Salary” category. If you have a side gig where you make an estimated $500 per month, add that to the “Side Hustles” category. This will help you quickly assess whether you’re on track to meet your expected income each month.
It’s also helpful to differentiate between reliable income (like your salary) and less predictable sources (like freelance work). This distinction helps you plan better by focusing on your stable income first and then budgeting your discretionary spending around fluctuating amounts.
Tracking Fixed vs. Variable Expenses
Once your income is tracked, it’s time to focus on expenses. Expenses are typically divided into two types: fixed and variable.
Fixed expenses are regular, recurring costs that don’t change month to month. Examples include:
- Rent or mortgage payments
- Utility bills (if they’re predictable)
- Insurance premiums
- Loan repayments
For fixed expenses, simply input the monthly amount you pay for each category. These numbers are easy to predict, and it’s important to ensure they are prioritized in your budget.
Variable expenses are less predictable and can fluctuate month to month. This category includes things like:
- Groceries
- Dining out
- Entertainment
- Gas and transportation costs
Variable expenses can change based on your lifestyle, so it’s important to estimate them as best you can and adjust as necessary throughout the month. You might want to track these expenses weekly or bi-weekly, especially if they tend to vary widely.
How to Manually Input Transactions
Google Sheets makes it easy to track both your income and expenses manually. As transactions occur, simply add them to the appropriate category. For example, if you spend $50 on groceries, input that amount under the “Groceries” category. The same goes for income—if you get paid a bonus of $200, add that to your “Additional Income” category.
You can set this up by adding rows for each transaction and categorizing them accordingly. Over time, this will give you a complete overview of your spending and earning patterns, making it easier to make adjustments where needed.
Using Google Sheets Functions to Track Totals Automatically
One of the great benefits of using Google Sheets is the ability to automate calculations, which can save you a lot of time and reduce human error. For example, once you’ve entered your income and expenses, you can use simple functions to track your totals automatically.
A few essential functions include:
- SUM: Adds up values in a range of cells. For example, to calculate the total income, use:
=SUM(B2:B10)This will add all values in cells B2 through B10, which might represent your income categories. You can apply the same for expenses, savings, or any other calculation.
- IF: Useful for conditional statements. For example, you can use this function to check if you’ve exceeded your budget in a certain category, like this:
=IF(B2 > C2, "Over budget", "On track")Here, if your actual spending (in cell B2) is greater than your budgeted amount (in cell C2), the sheet will display “Over budget.” This helps you stay informed about where your spending is going.
By using these functions, Google Sheets becomes a dynamic tool for real-time budget tracking, helping you maintain a clear view of your finances without the need to constantly update totals manually.
How to Set Budget Goals?
Setting clear, measurable goals is a key aspect of any budgeting strategy. Whether you’re looking to save for a big purchase, pay off debt, or simply control your spending, having concrete goals can help keep you focused and motivated. Here’s how to set and track your financial goals in Google Sheets.
Defining Monthly, Quarterly, and Annual Budget Goals
To stay organized, it’s helpful to break your goals down into different timeframes. Defining monthly, quarterly, and annual goals allows you to track your progress over time and adjust your strategy as needed.
- Monthly Goals: These are short-term goals you aim to achieve within a single month. For instance, you might aim to save $200 in a month or reduce dining-out expenses by 10%. These goals are great for maintaining a manageable focus while still working toward bigger objectives.
- Quarterly Goals: A step up from monthly goals, quarterly goals span three months. This could include saving up for a vacation or paying off a chunk of debt. Quarterly goals allow you to track longer-term progress while still keeping things achievable within a 3-month period.
- Annual Goals: These are the big-ticket goals, like building an emergency fund, saving for a car, or preparing for a major life event. Setting an annual goal gives you a long-term focus and provides a sense of accomplishment when you hit it.
By breaking down your goals into smaller timeframes, you’ll be able to track progress, make adjustments, and keep your motivation high throughout the year.
Using Conditional Formatting to Visualize Progress Toward Goals
One of the easiest ways to track progress visually is by using conditional formatting in Google Sheets. This feature allows you to change the color of cells based on specific conditions, making it simple to see how well you’re doing with each goal.
For example, if you’re tracking your savings goal, you could set it up so that once you reach 100% of your goal, the cell turns green. If you’re behind on your target, it could turn yellow or red, depending on how much you’ve saved.
To set up conditional formatting:
- Highlight the cell or range of cells that you want to format.
- Go to Format > Conditional formatting.
- Set your desired rule (e.g., “Greater than or equal to” a target amount).
- Choose a color to represent your progress (e.g., green for on track, red for over budget).
This visual cue helps you easily identify where you need to adjust and what’s going well. It’s a simple, but powerful way to stay engaged with your budgeting goals.
Setting Savings Targets and Tracking Them in Your Sheet
Saving money is one of the most common budget goals, whether it’s for an emergency fund, a vacation, or retirement. By setting clear savings targets, you can ensure that you’re putting money away consistently toward your financial future.
In your Google Sheets budget, create a dedicated savings category. Under this category, set a target amount for each month or quarter. If you’re saving for a long-term goal, you can break it down further into manageable chunks.
To track your savings progress:
- Create a row for each month, listing the savings target and actual savings.
- Use a formula to subtract your actual savings from your target to track the difference.
- Set up conditional formatting to visually show when you’ve reached your goal, or when you’re falling short.
For example, if your monthly savings goal is $500, and you saved $450, you can set a simple formula to show you’re 90% of the way there. If you achieve the target, the cell can turn green to celebrate the achievement.
By consistently setting and tracking your savings targets, you can stay motivated and maintain focus on your long-term financial goals. This approach also gives you the flexibility to adjust when things are going well or when unexpected expenses arise.
How to Automate Your Budgeting Process?
One of the best features of Google Sheets is its ability to automate calculations and streamline the process of tracking income and expenses. By leveraging the power of built-in functions and formulas, you can make your budgeting process more efficient and save time.
1. Use Built-In Google Sheets Functions Like SUM, AVERAGE, and IF
Google Sheets has a range of functions that can automate your budgeting tasks and reduce the time you spend manually adding and updating numbers. For instance:
- SUM: This is one of the most commonly used functions for adding up numbers in a range. It’s perfect for calculating the total amount of income or expenses in a given category. For example, if you want to calculate your total income for the month, you would use:
=SUM(B2:B10)This formula adds all the values in cells B2 to B10.
- AVERAGE: If you want to track your spending patterns over time, the AVERAGE function is useful. It calculates the average value of a range of numbers. For example, to see your average monthly grocery spending over the last six months, you would use:
=AVERAGE(C2:C7) - IF: The IF function lets you create conditional statements. For example, you can set it up to alert you when you exceed a certain budget threshold. For instance, if your grocery budget is $300 and you want a warning when you exceed that, the formula would look like this:
=IF(C2 > 300, "Over Budget", "On Track")This simple formula checks whether the value in cell C2 is greater than $300 and provides a status update accordingly.
By incorporating these functions into your budget, you can automatically track totals, averages, and conditional statuses without needing to do any manual calculations.
2. Create Automatic Expense Categories and Budget Alerts
One way to make budgeting even more efficient is by automating your expense categories and setting up budget alerts. For example, you can create a dynamic category system that automatically updates when you input a new transaction. You could also create budget alerts to notify you when you’ve reached or exceeded your preset budget limits.
Here’s how you can set it up:
- Dynamic Category System: Use the IF function to assign transactions to specific categories based on keywords. For example, if a transaction includes “coffee” or “dining” in the description, it could automatically be assigned to the “Dining Out” category.
- Budget Alerts: You can use conditional formatting to highlight cells or categories that exceed your budget limits. For instance, if you set a budget limit of $200 for groceries, the cell will turn red once you exceed that limit. This visual cue helps you stay on top of your spending without needing to constantly check the numbers.
3. Set Up Recurring Expenses Using Formulas or Add-ons
If you have recurring expenses, such as rent or subscriptions, you can automate these entries in Google Sheets. There are two ways to handle this: by using formulas or add-ons.
- Formulas: You can use the ARRAYFORMULA function to automatically populate cells with recurring values. For instance, if you pay $1,200 in rent every month, you can set it up to automatically fill a column with that amount:
=ARRAYFORMULA({1200; 1200; 1200; 1200})This would automatically fill the next four rows with the rent value.
- Add-ons: There are several Google Sheets add-ons available for automating financial tasks. For example, tools like Tiller Money or Mint integrate directly with Google Sheets to automatically download your bank statements and categorize your expenses, saving you time.
By automating recurring expenses, you reduce the chance of human error and ensure your budget remains up-to-date without constant manual updates.
How to Use Google Sheets Charts to Track Spending?
Visualizing your finances is a powerful way to gain insight into where your money is going. Google Sheets makes it easy to create pie charts, bar graphs, and line graphs to help you better understand your spending patterns and make more informed financial decisions.
How to Create Pie Charts, Bar Graphs, and Line Graphs?
Charts and graphs are great tools for representing your financial data visually. In Google Sheets, you can create a variety of chart types, including:
Pie Charts
Pie charts are useful for showing how your total expenses break down by category. For example, you could create a pie chart to show what percentage of your monthly income goes toward rent, utilities, groceries, etc.
To create a pie chart:
-
- Select the data you want to visualize (category names and amounts).
- Click on Insert > Chart.
- In the Chart Editor, choose the Pie Chart option.
Bar Graphs
Bar graphs are excellent for comparing expenses across different categories. You might use a bar graph to compare your monthly spending in different areas, like dining out versus groceries.
To create a bar graph:
- Select the data you want to compare.
- Click on Insert > Chart.
- In the Chart Editor, select Bar Chart as the chart type.
Line Graphs
Line graphs are great for showing trends over time, like how your expenses change from month to month. For instance, you can use a line graph to track your total expenses or savings progress throughout the year.
To create a line graph:
- Select the data you want to plot.
- Click on Insert > Chart.
- In the Chart Editor, select Line Chart.
Each of these chart types provides a different way to understand your financial data. The right type of chart depends on what kind of analysis you’re looking to do.
Visualizing Income vs. Expenses for Better Insight
One of the most useful visualizations for budgeting is the income versus expenses chart. This chart allows you to compare how much you earn versus how much you spend, which can provide insight into whether you’re living within your means or if you need to adjust your spending habits.
To create an income vs. expenses chart:
- Organize your income and expenses in separate columns.
- Select the data you want to compare.
- Insert a Bar Graph or Column Chart to display income on one side and expenses on the other.
This visualization gives you an immediate snapshot of whether you’re overspending or if your income is sufficient to meet your needs. Over time, you’ll be able to adjust your budget based on these insights.
Using Conditional Formatting for Easy Data Interpretation
Conditional formatting is an invaluable tool when it comes to quickly identifying areas where you need to take action. This feature automatically changes the color of a cell based on its value, which can help you easily spot problem areas in your budget.
For example, you can set up conditional formatting to turn a cell red if your spending exceeds your budget for a specific category. To set this up:
- Highlight the cell or range of cells.
- Go to Format > Conditional formatting.
- Set the rule (e.g., “Greater than” your budgeted amount).
- Choose a color to visually indicate the condition (red for overspending, green for under budget).
Using conditional formatting alongside charts gives you a complete, easy-to-understand overview of your financial status.
How to Analyze Your Spending Patterns?
After tracking your expenses for a while, it’s time to take a step back and analyze your spending patterns. Google Sheets offers powerful tools to help you analyze your data, such as pivot tables, and allows you to adjust your budget accordingly.
1. Use Pivot Tables for Detailed Expense Analysis
Pivot tables are one of the most powerful tools in Google Sheets when it comes to analyzing large sets of data. They allow you to summarize your expenses by category, time period, or any other variable you choose.
To create a pivot table:
- Highlight the data you want to analyze.
- Click on Data > Pivot table.
- In the Pivot Table Editor, choose the rows and columns you want to analyze (e.g., expense categories and dates).
- You can filter, sort, and group your data to uncover deeper insights into your spending.
For example, you could use a pivot table to see how much you spend on transportation each month or analyze trends in your entertainment spending. This deeper level of analysis can help you identify areas to cut back on or prioritize saving.
2. Review Monthly Trends and Adjusting Your Budget Accordingly
Looking at your spending on a month-to-month basis helps you understand if you’re keeping up with your financial goals. If you notice that you’re spending more on dining out or entertainment than you initially planned, it may be time to adjust your budget for the upcoming month.
By using the data from your pivot tables, charts, and budget totals, you can quickly identify spending trends. If your income has increased, you might want to allocate more toward savings or reduce debt. If you’ve overspent in certain areas, consider reducing those expenses in the following months.
3. Set Up a Monthly Review and Budget Adjustment Process
Regularly reviewing your budget is key to staying on track with your financial goals. By setting aside time at the end of each month to review your spending, you can make adjustments for the next month. This process helps you stay proactive instead of reactive when it comes to your finances.
To make this process easier, set up a recurring reminder to review your budget at the end of each month. This review should involve checking in on your goals, analyzing any unexpected expenses, and making necessary adjustments for the following month. Google Sheets makes this process smooth with automated functions, graphs, and pivot tables that provide all the information you need in one place.
Sharing and Collaborating on Your Google Sheets Budget
When you’re working with others, whether it’s a partner, family, or financial advisor, sharing and collaborating on your budget is essential to ensure everyone is on the same page. Google Sheets makes this process seamless, allowing you to work together in real time.
By sharing your budget, you enable everyone involved to add or edit information as necessary. This is particularly helpful for household budgets, where multiple people contribute to or monitor different expenses. You can collaborate on a single document, track progress together, and adjust your budget as needed.
Here are a few important things to keep in mind when sharing and collaborating on your budget:
- Real-time updates: Every time someone makes a change to the sheet, it updates automatically, ensuring all collaborators see the most current version.
- Permissions: You can adjust permissions to control who can view or edit the document. For example, you might allow some people to only view the sheet while giving others the ability to edit.
- Comments and notes: Google Sheets allows you to leave comments in specific cells. This feature is useful for discussing certain expenses or providing explanations for adjustments in the budget.
- Version history: Google Sheets automatically keeps track of all changes made to the document, so you can easily revert back to an earlier version if necessary.
Collaborating on a shared budget makes it easier to stay organized, keep track of who’s responsible for what, and ensures that no one is left out of the financial planning process.
Advanced Google Sheets Budgeting Tips and Tricks
Once you’ve mastered the basics of budgeting in Google Sheets, you might want to take things to the next level. By implementing advanced features and tools, you can further optimize your budgeting experience and make the process even more efficient. Whether you’re looking for better organization, increased automation, or enhanced analysis, there are plenty of tricks you can use.
Here are some advanced tips to supercharge your Google Sheets budget:
- Use Google Sheets add-ons: There are many add-ons available that integrate with your budget, such as those for importing bank data, automating financial reports, or syncing with expense management apps like Mint or YNAB (You Need a Budget).
- Advanced formulas: Learn more advanced formulas such as QUERY, VLOOKUP, or INDEX MATCH to pull data from different sheets or ranges and perform more complex calculations.
- Data validation: Use data validation to create dropdown lists for categories or expense types, making it easier to enter consistent data.
- Automate reminders: Set up email notifications or reminders by linking your budget to Google Calendar or Google Apps Script to keep track of payment due dates or savings milestones.
- Use scripts for custom automation: Google Apps Script allows you to automate certain functions or actions in your budget. For example, you can write custom scripts to send notifications when you exceed your budget or automatically adjust totals based on new data.
- Create a dynamic dashboard: Use charts, graphs, and pivot tables to create an interactive dashboard that gives you a visual overview of your finances, allowing you to track progress toward your goals at a glance.
- Link budgets with bank accounts: For a more seamless experience, integrate your Google Sheets budget with online banking tools to automatically import and categorize your transactions, reducing the time spent on manual data entry.
- Use conditional formatting creatively: Go beyond the basics of conditional formatting to create complex color-coded systems that help you quickly identify spending patterns, overages, or potential savings opportunities.
By incorporating these advanced techniques, you can make your budgeting process even more effective, helping you stay on top of your financial goals while saving time and effort.
Conclusion
Using Google Sheets for budgeting gives you the freedom to fully control how you manage your finances. With its easy-to-use features like automatic calculations, customizable templates, and the ability to visualize your spending, you can stay on top of your income and expenses without feeling overwhelmed. The best part is that it’s flexible enough to accommodate any financial situation, whether you’re tracking monthly expenses, setting savings goals, or analyzing trends over time. As your financial needs change, Google Sheets grows with you, allowing you to adapt your budget quickly and efficiently.
By taking advantage of Google Sheets’ collaboration features, real-time updates, and automation tools, you can make budgeting less of a chore and more of a tool to help you achieve your goals. Regularly reviewing your budget and adjusting it as needed will help you stay on track, save money, and avoid overspending. Once you get the hang of it, budgeting with Google Sheets becomes second nature—and you’ll have all the insights you need to make smart financial decisions every day.
Get Started With a Prebuilt Template!
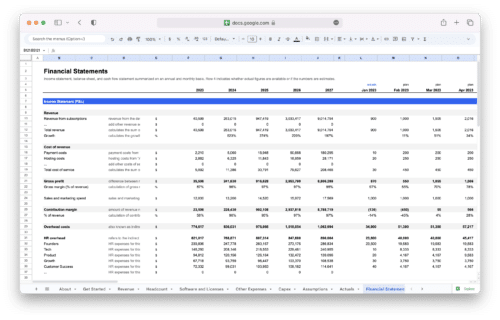
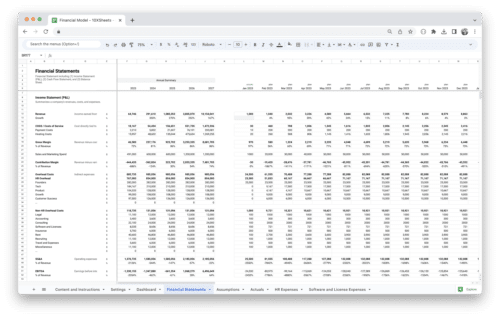
Looking to streamline your business financial modeling process with a prebuilt customizable template? Say goodbye to the hassle of building a financial model from scratch and get started right away with one of our premium templates.
- Save time with no need to create a financial model from scratch.
- Reduce errors with prebuilt formulas and calculations.
- Customize to your needs by adding/deleting sections and adjusting formulas.
- Automatically calculate key metrics for valuable insights.
- Make informed decisions about your strategy and goals with a clear picture of your business performance and financial health.
-
Sale!

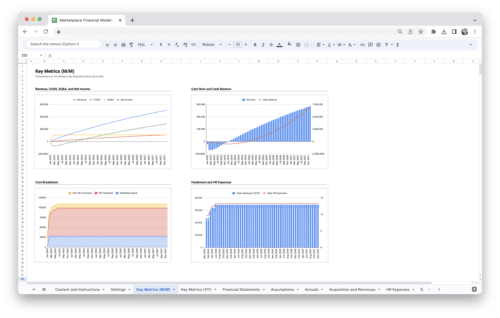
Marketplace Financial Model Template
Original price was: $219.00.$149.00Current price is: $149.00. Add to Cart -
Sale!
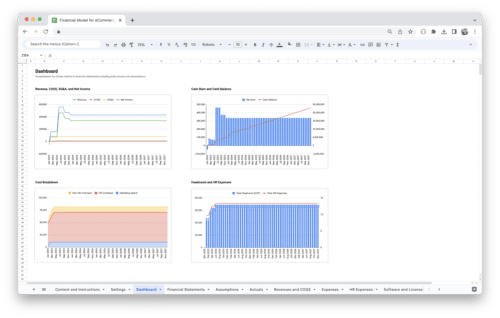
E-Commerce Financial Model Template
Original price was: $219.00.$149.00Current price is: $149.00. Add to Cart -
Sale!

SaaS Financial Model Template
Original price was: $219.00.$149.00Current price is: $149.00. Add to Cart -
Sale!
Standard Financial Model Template
Original price was: $219.00.$149.00Current price is: $149.00. Add to Cart -
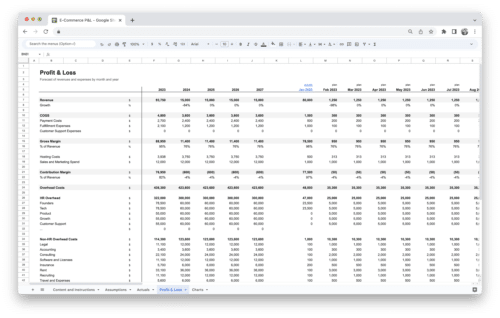
Sale!
E-Commerce Profit and Loss Statement
Original price was: $119.00.$79.00Current price is: $79.00. Add to Cart -
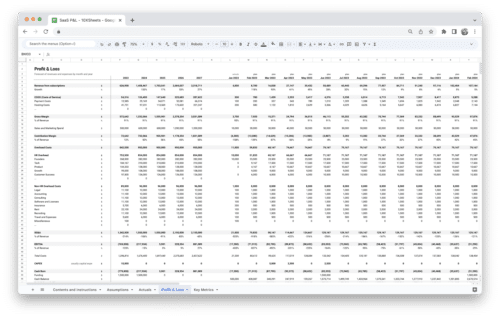
Sale!
SaaS Profit and Loss Statement
Original price was: $119.00.$79.00Current price is: $79.00. Add to Cart -
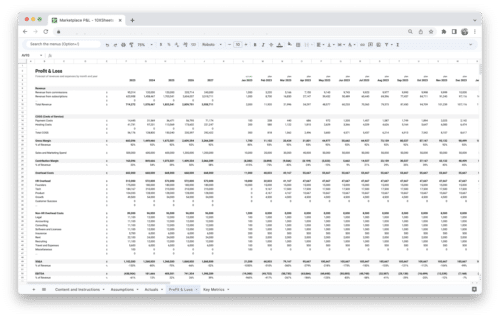
Sale!
Marketplace Profit and Loss Statement
Original price was: $119.00.$79.00Current price is: $79.00. Add to Cart -
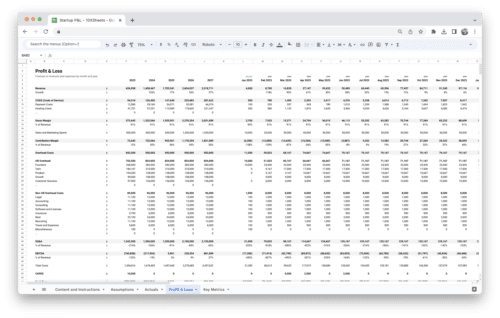
Sale!
Startup Profit and Loss Statement
Original price was: $119.00.$79.00Current price is: $79.00. Add to Cart -
Sale!
Startup Financial Model Template
Original price was: $119.00.$79.00Current price is: $79.00. Add to Cart